Showing posts with label sentimental mash-up. Show all posts

Wednesday, May 18, 2022

Mixed Up Birthday

Hey everyone, I'm back today with a mixed up birthday card. Why do I call it mixed up? I call it that because I used a lot of different products and I wasn't sure it was going to work out. My biggest concern was if the delicate flower would work with the bold stenciled background. I am pleased to say I really like it! My encouragement to everyone is to play and try new things because you never know how it will turn out.


I started by creating the background with the mixed up stencil(SNSS) and inks from Concord and 9th(ballet slipper, sprout and sea glass). I die cut the panel, matted with another panel inked along the edges with sea glass and wrapped some white twine along the edge. I used the same ink along with the shiplap background on the white card base and attached the panel to it. 

I stamped the images and birthday sentiment with VersaFine Claire Nocturne ink on white cardstock. I colored the flower and leaves with sea glass and ballet slipper ink. I wasn't happy with the color of the flower, so I went over it with an alcohol marker from Altenew(coral berry). I fussy cut the images and glued them to the stenciled panel. I trimmed down the sentiment strip and attached to the front with foam tape. Finally, I stamped the word happy directly on the background and added three colored dots to finish it off.


Supplies from Sweet 'n Sassy Stamps:

Mixed Up Stencil 

Shiplap Background 

Encouraging Peonies

 Sentimental Mash-up


This post linked to:

Word Art Wednesday - Anything Goes

AAA Birthday: Game #37 Let's Party  

Tic Tac Toe Challenge: #161 Layers, Bow, Floral

The Four Seasons Challenge: May Anything Goes Spring 

The Card Concept: #175 May Flowers I was inspired by the flowers and pink colors in the photo to created my mixed media card.


I hope you enjoyed today's card and thanks so much for stopping by!

Saturday, June 6, 2020

Dazzling Dahlia No Color Cards

Hello everyone, Sweet 'n Sassy Stamps has just released seven brand new stamp sets! One of the new sets is the gorgeous Dazzling Dahlia! The flower is huge! I knew it was big, but it didn't dawn on me just how big until it arrived. It is gorgeous all colored up, but sometimes we just need a quicker card. So, I decided to showcase some ways to use this flower without coloring it.


My first card was inspired by some red and white cards I saw on Instagram recently. They were so striking and I knew I wanted to try it out with this new set. I found a piece of red pattern paper in my stash and paired it with real red ink. I stamped the flower onto a slightly off white card base and stamped the sentiment onto a scrap of the same cardstock. I die cut along the edge of the pattern paper with a scallop edge die. Next, I popped the pattern paper piece up with foam tape along the top edge. Finally, I punched two holes in the sentiment strip, tied some red string into a bow and popped up along the left edge.


For my second card, I wanted to do a variation of my first card. I started by finding a scrap of pretty pattern paper and coordinating cardstock. I settled on garden green and matching ink. I heat embossed the flower on the green panel with Versamark and white embossing powder. I decided to die cut the green panel and mount on the same card base as my first card. I stamped the sentiment from Sentimental Mash-up in green ink and assembled in the same way as above.


So there you have it, two quick and easy cards using the gorgeous Dazzling Dahlia. Love this flower!

Thanks so much for stopping by and have a fantastic day!

Karen

I would love to have you follow my blog. Just click the follow button on the right if your interested. If your on the mobile version, just scroll down and switch to the web version and you will then be able to see the follow button.

Wednesday, March 18, 2020

SNSS March Release Blog Hop

Welcome to the Sweet n' Sassy Stamps March Release Hop!

There's another fabulous release in the SNSS shop that we've been stamping with and we're so excited to share our projects with you! Hop along and leave a little comment love for the designers linked below and you just might be a lucky winner! One lucky comment from all the comments along the hop will win a $10 gift voucher to the Sweet n' Sassy Stamps shop. Winner will be announced on the SNSS blog, Wednesday, March 25th.

I decided to use the new Messy Stamped Alpha to create a background. I used an oldie but goodie technique called popping pastels. If you are unfamiliar with popping pastels, all you need to do is stamp images with versamark ink onto white cardstock, then rub chalk pastels over the top using cotton balls (rub the cotton ball onto the chalk then on the cardstock). The images you stamped will magically pop darker than the rest of the cardstock. So much fun!


I peeled the backing off the Messay Stamped Alpha, inked up all the letters with versamark ink, pressed onto my paper (repeating until the piece of paper was covered) and then rubbed with three different colors of chalk. Once that was done, I stamped and die cut out the coffee cup and cup sleeve from the Fill Me Up set and coordinating  Fill Me Up Die.

I used the coffee cup die to cut the top part of the coffee cup from a scrap piece of black cardstock. I lined the portion of the die that would be the bottom of the lid along the edge of the cardstock, by doing this I did not need to trim and had the perfect lid. I stamped the sentiment from  Sentimental Mash-up onto kraft cardstock and cut down to size. I utilized sketch #426 from Freshly Made Sketches for my layout.


 Thanks for stopping by and your next stop on the hop is the amazing Lee Ann Barrett!


Wednesday, February 26, 2020

Deepest Sympathy

Hello friends! Today I am sharing an easy card using the watercolor stamping technique. This is the kind of card you want to make multiples of because they go together so fast and make great gifts too.

For this card, I used a Tim Holtz Distress Sprayer, canson xl mixed media paper, paintbrush (for the splatters) and Kaleidacolor ink pad. I used a Late November Kaleidacolor ink pad I have had in my collection for years. If you do not have a Kaleidacolor ink pad you can use any coordinating single color ink pads. Just make sure to always ink up lightest to darkest color.


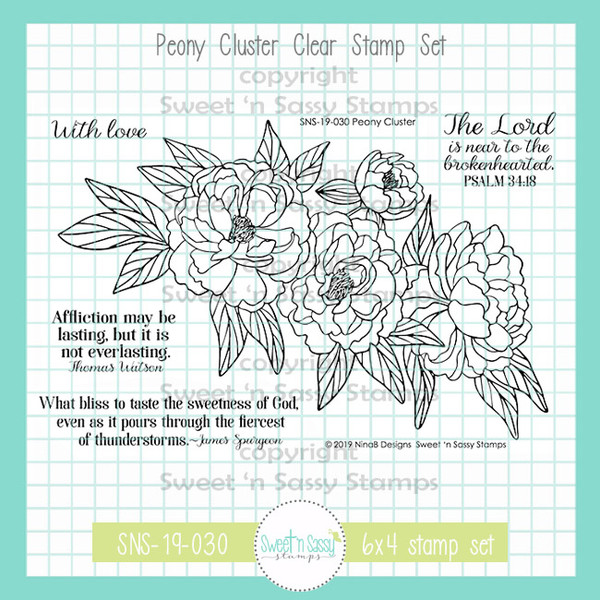
First, I inked up the gorgeous flower from Peony Cluster with my Kaleidacolor ink pad (outline stamps work best for this technique). Once I had the stamp inked up well I spritzed it with water*.  Then stamped it onto the paper, pressing firmly. You can use blocks or a stamping platform. Next, I smooshed my ink pad onto an acrylic block, spritzed with water and used a paintbrush to create the splatters.

Once it was dry, I stamped the words from Sentimental Mash-up with VersaFine Clair Nocturne Ink. I trimmed the white and black panel for matting and attached to a marigold color card base. Finally, I wrapped the string around the card front twice (string shows on the inside), knotted and trimmed the ends letting them dangle down the side.

This technique is designed to give softer lines instead of crisp lines. Often, the ink will spread more giving a wonderful watercolor look to your card. You will never get the same look twice  and that is the beauty of it.

* The water is the tricky part, too little and it won't really work and too much and you have a big mess. I have done this technique before and I find that clear stamps require a little extra water.


Thanks for stopping by and have a fantastic day!

I would love to have you follow my blog. Just click the follow button on the right if your interested. If your on the mobile version, just scroll down and switch to the web version and you will then be able to see the follow button.

Saturday, February 22, 2020

Sending Hugs

Hi friends! I am sharing this sweet card featuring the adorable bunny from Lots of Love along with Texture Tiles 5 and Sentimental Mash-up from Sweet 'n Sassy Stamps. I know, when you see balloons and a cupcake you automatically think birthday card. I thought this bunny was perfect for a snail mail hug.


I started by stamping the bunny onto canson mixed media paper with VersaFine Clair Nocturne Ink and heat set it. Next, I colored the bunny with Arteza Real Brush Pens with the following colors: smoke gray, ice blue, arctic blue, rouge pink and chocolate. I used the same black ink to stamp the sentiments from the new Sentimental Mash-up set. Love this mix and match sentiment set! I used a stitched rectangle die to cut the white panel and a scallop stitched rectangle die for the turquoise panel I used behind the white piece.

Then I stamped the polka dots from Texture Tiles 5 onto the lighter blue cardstock.  I adhered it to a turquoise card base and attached the die cut layers to it. I added some small sequins as the final touch.


Thanks so much for stopping by and have a wonderful day!

I would love to have you follow my blog. Just click the follow button on the right if your interested. If your on the mobile version, just scroll down and switch to the web version and you will then be able to see the follow button.

Wednesday, February 12, 2020

February Blog Hop Sweet 'n Sassy Stamps

Welcome to the Sweet n' Sassy Stamps February Release Hop!

There's another fabulous release in the SNSS shop that we've been stamping with and we're so excited to share our projects with you! Hop along and leave a little comment love for the designers linked below and you just might be a lucky winner! One lucky comment from all the comments along the hop will win a $10 gift voucher to the Sweet n' Sassy Stamps shop. Winner will be announced on the SNSS blog, Wednesday, February 19.

I made my card with the new sets Dragonfly Dreams and the stamp of the month Sentimental Mash-up. The dragonflies are a layering stamp set (it's amazing) and pairs perfectly with the mixed fonts of the sentiment set. I used a painting techique I learned watching a video Korin did live during the January stamp-a-thon in the VIP Group on Facebook.


I used Canson XL watercolor paper for the technique (it is the second one taught in the video). I started with dry paper and then using a damp flat brush I dipped each side into a different coordinating color of watercolor paint. I used artist loft brand from Michaels. I chose a green and blue hue that I thought would work well together. Then starting at the edge of the paper swipe the brush, repeat until one side is covered. Don't worry about being perfect or having even edges as it adds to the effect. You don't want your brush too wet as it needs to be on the drier side for this technique.

Then I added some paint splatters in green, blue and black, but felt like the background needed something else. So I pulled out Texture Tiles 1 and added some black grid marks and blue dots on the painted side and die cut the panel. Next, I stamped and heat embossed the dragonflies with black embossing powder onto blue cardstock and fussy cut out. I decided on placement of the dragonflies and adhered to the painted piece. I then stamped the words on the front with VersaFine Clair Nocturne ink. As the final touch I added three small sequins.


Thanks for stopping by and your next stop on the hop is the amazing Lee Ann Barrett!