Showing posts with label love wordfetti. Show all posts

Sunday, February 13, 2022

A Trio of Valentine's Day Cards

I'm sharing a couple of Valentine's Day cards I made with some backgrounds I created a few weeks ago. You can see another card that I made using one of them here.


Backgrounds I made a few weeks ago. 


I die cut a whole bunch of hearts from the one panel. I created three cards featuring them.


Card #1


The background was created with a second generation inking of the Grunge Grid stencil. After you ink up the first piece of cardstock with full color, remove, spritz stencil with water and lay over another piece of cardstock. It produces a beautiful faded version of the first piece.

For the background panel, I added tiny stenciled hearts, black paint splatters and some texture using two texture tiles stamp sets. I die cut the panel, mounted on black and attached to a white base. I stamped the sentiment with black ink and the XO in pink and trimmed to size. 

The hearts came from ink smooshing all the excess ink off the Grunge Grid stencil and my mat from the pink and green backgrounds I created. It wasn't dark enough so I laid down some more ink and picked up more color. 

I die cut the hearts and decided on the placement of the sentiment. Then arranged and glued down the hearts so they cascaded along the edge of the panel. I added the XO to finish it off.


Card #2


The the background for the green version was created in the same way as the pink one. The hearts were cut from the same panel as the first one, spritzed with a glitter spray before attaching to the panel. I did add some extra ink to the hearts to brighten some of them up before adding the glitter.


Card #3. Once I die cut all the hearts from the panel, I decided it was too pretty to throw away and made it into a card. 


I matted the heart panel, after spraying with glitter, on a piece of cardstock inked up with a pale pink ink. I used the same color ink to stamp words and small hearts inside the cut out hearts. Then, I die cut the panel, matted with pink and attached to a white base. I die cut the large heart in three colors, added texture with two texture tiles stamps sets, spritzed with glitter spray and glued to the front. I stamped the sentiments with black, trimmed to size and popped up with foam tape as seen.

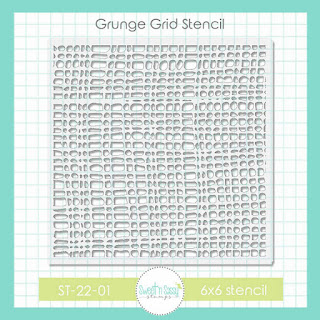

Grunge Grid Stencil

Bitty Hearts Stencil

Hearts Die Set


 Texture Tiles 1


Texture Tiles 6 

Much Love


 Love Wordfetti

Typewriter Blocks Alpha


Latte Love(small solid heart) 


This post linked to:


I hope you enjoyed today's card and thanks so much for stopping by!

Karen


Saturday, February 6, 2021

Love Bug


Happy Saturday everyone! Ever since Vintage Van was released, I have wanted to use the van to create a Valentine's Day card. I had a blast creating it!


The background on this card started out as a test piece for another card I made for the January release. I messed up the embossing and decided to test out background colors on it. Once I was done testing out the colors I was going to toss it, but decided to hang onto it for a bit and I'm glad I did.

I embossed the hearts from Grunge Elements 2 with clear embossing powder on white cardstock and cut with a stitched rectangle die. I ink blended with cracked pistachio, weathered wood and chipped sapphire distress oxide inks. At first, I wasn't sure I liked this combo but it grew on me.

I stamped the Van and love sentiment from Vintage Van with VersaFine Clair Nocturne ink on white. I colored with the above distress oxide inks along with mustard seed and black soot. I stamped the sentiments from Love Wordfetti on white and trimmed down to size. It's hard to see in the photo but I popped the sentiments and van up with foam tape. 


 Love Wordfetti and Grunge Elements 2 are part of the awesome Overstock Sale

going on for the entire month of February. Check it out!


I hope you enjoyed today's card and thanks for stopping by!

Karen

Saturday, January 16, 2021

My Happy Place

 Happy Saturday everyone! I'm sharing this clean and simple Valentine's Day card with you today.


I began by cutting a white cardstock panel with a stitched edge rectangle die. I stamped the banner from Happy Camper across the top with VersaFine Clair Nocturne ink and the small hearts from Sweet Little Lamb in red along the bottom. Then, I stamped the camper (Happy Camper) on white and the sentiment from Love Wordfetti on pink.  I colored the banner and camper with Arteza Real Brush Pens and fussy cut the camper. I assemble as seen, cutting banner ends on the sentiment strips.


I hope you enjoyed today's card and have a great day!

Karen

Wednesday, January 13, 2021

Sweet 'n Sassy Stamps January Release Hop & Giveaway

We are so excited to be hopping today with some inspiration with the fabulous January Release. Hop along and leave a little comment love for the designers linked below and you just might be the lucky winner of a $25 gift voucher to the Sweet n' Sassy Stamps shop. Winner will be announced on the SNSS blog, Wednesday, January 20th.


 I'm sharing two cards today featuring three of the new January Release sets. 

My first card features two of the new coffee themed sets, I Like Big Cups and Coffee Talk 2. I love coffee and collecting coffee stamp sets!


I wanted to create a little bit snarky non-traditional color Valentine's Day card. I started by embossing the hearts from Grunge Elements 2 in clear embossing powder on bristol smooth cardstock. I cut the panel with a stitched rectangle die, ink blended with chipped sapphire distress oxide ink and added a piece of washi tape. 

I stamped the coffee cups with VersaFine Clair Nocturne ink onto white cardstock and pattern paper. I stamped the lids a second time and coffee sleeves on white. I fussy cut the cups, lids and sleeves. I stamped the sentiment from Coffee Talk 2 and XO from Much Love with chipped sapphire on the coffee sleeves. 

I paper pieced the cups together. I stamped Happy Valentine's Day from Love Wordfetti on white and cut a banner tail. I assembled the card on a white card base popping one of the coffee cups and sentiment up with foam tape. 


My second card features the fun new set Background Builders: Stripes and I used a previous layout from Freshly Made Sketches.  


I began by stamping the thicker stripes from Background Builders: Stripes with buttercup ink on so saffron cardstock to create a tone on tone effect. I cut the panel down and mounted on a black panel. Next, I stamped the Delightfully Delicate Background with VersaMark ink on a kraft cardstock base. 

I stamped the teapot from In This Together, with VersaFine Clair Nocturne ink, colored with Arteza watercolor brush markers and fussy cut out. I stamped the sentiment with black ink on kraft cardstock and assembled the card popping the sentiment up with foam tape.  


Giveaway: Leave a little shout out in the comment section on each stop along the way for a chance to win a $25 gift voucher to the Sweet 'n Sassy Stamps shop! Comment deadline is 10 pm ET Tuesday January 19th with winners announced on the 20th.


Thanks for stopping by and your next stop on the hop is the amazing Lee Ann Barrett!


Thanks so much for stopping by and have a fantastic day,

Karen

 **If you would like to follow my blog, just click the follow button on the right. If your on the mobile version, just scroll down and switch to the web version and you will then be able to see the follow button.**

Friday, June 26, 2020

By the Sea

I know I can't be the only one who has stamp sets that have never seen ink. So, I decided to mix in one set each month that has never received any inky love. I bought By the Sea last summer and never got around to using it. Then, it was the wrong time of year to be making summer cards. This set was first on my list to ink up before it's too late to make beach themed cards again.


This card has me longing to be at the beach soaking in the sun while listening to the sweet sounds of summer. I stamped the images and sentiment with VersaFine Clair Nocturne ink onto canson xl mixed media paper and kraft. I colored the sun (fresh lemon), sky (sea breeze) and water (sea breeze, dusk) with Altenew's watercolor brush markers sets Tropical Fiesta and Spring Garden.

I used Arteza real brush pens to color the sand (ginger), chair (chocolate) and grass (olive green). For the beach umbrella, I used SU! cameo coral ink pad and watercolor brush. Finally, I die cut the center panel and sentiment with the stitched rectangle and sentiment strips dies from MFT, fussy cut the sun and assembled as seen.


Sweet 'n Sassy Stamps is having a summer kick-off sale. Check it out!


Thanks for stopping by and happy stamping!

Karen