Showing posts with label Knit Stencil. Show all posts

Saturday, April 23, 2022

Happy for You

 I'm back today with another bird card featuring another one of the background panels I made the beginning of April. 


Earlier this month I made a bunch of backgrounds with the knit stencil. I have used these backgrounds all month long as the starting point for most of my cards. For this card, I utilized the background I created with poppy, marmalade and buttercup inks from Concord&9th.


I die cut the panel, inked up the woodgrain stamp with close to cocoa ink and stamped repeatedly over the panel. Then, I inked up the typewrite text background with walnut stain distress ink and stamped it over the top again, repeating until fully covered. I stamped the sentiment with VersaFine Claire Nocturne ink directly on the panel.

I stamped and embossed the bird image on watercolor paper and colored with Altenew watercolor color brush pens. I glued half a doily to the panel, matted the panel with kraft and attached to a white card base after wrapping twine around it. Finally, I popped the bird up with foam tape to complete the card.


Sweet 'n Sassy Stamps

Song Birds Bundle

Texture Tiles 2

Typewriter Text Background 

Knit Stencil


This post linked to:

The Four Seasons Challenge: Anything Goes Spring 

Word Art Wednesday: Anything Goes


I hope you enjoyed today's card and thanks so much for stopping by!

Thursday, April 21, 2022

Vintage Song Birds

I love birds, bird images and coloring bird images! So, I was super excited to see a new bird set released this month from Sweet 'n Sassy Stamps. 


Earlier this month I made a bunch of backgrounds with the knit stencil. I have used these backgrounds all month long as the starting point for most of my cards. For this card, I utilized the pink and white background for my vintage themed card.


I die cut the panel,  inked up the script background with honeysuckle ink and stamped on top it. Then, I added some of the elements from going postal with vintage photo and walnut stain distress ink. Next, I inked along the edges with vintage photo to complete the look. I stamped the sentiment directly on the panel. Because I had white pigment ink on the base, I couldn't get the ink as dark as I wanted it. I was initially disappointed with this, but then realized it worked for the card.

I stamped and embossed the bird image on watercolor paper and colored with Altenew watercolor color brush pens. I softened the white outline of my die cut image by using antique linen distress ink with some water along the edges. Love how this adds to the vintage vibe! I cut a white doily in half and inked it up lightly with vintage photo distress ink. I glued the doily to the pink panel, matted the panel with brown and attached to a kraft card base(distressed the edges with ink) after wrapping twine around it . Finally, I popped the bird up with foam tape to complete the card.


Sweet 'n Sassy Stamps

Song Birds Bundle

Script Background 

Going Postal

Knit Stencil


This post linked to:

Word Art Wednesday: Anything Goes 

The Card Concept: Vintage Style I was inspired by the bird along with the color pink to create my vintage styled card.


 I hope you enjoyed today's card and thanks so much for stopping by!

Wednesday, April 13, 2022

Rise Up

I'm back today with another card using one of the scripture references from Sweet 'n Sassy Stamps Church Family set. I have already made a request for more of them to be incorporated into future sets. I love them so much! Of course, the sentiment set needed to be paired with lots of other goodies too!


My background started with another panel form my play session earlier this month.


I chose the multicolor panel with the brown as my starting point. I used marmalade, poppy and wheat ink from Concord&9th along with close to cocoa from SU!. I added texture to the panel using close to cocoa ink and the woodgrain stamp. You can never go wrong with a few black paint splatters. Once that was done, I added the sunburst layering stencil with white ink. I didn't like it, so I lined my stencil back up over it and covered it with brown, much better. I die cut the panel, matted with black and attached to a white card base.

I stamped the sunflower stem once and flower head twice on white cardstock. I colored the images with my Altenew watercolor brush markers. I fussy cut the images and glued to the front of the card. I rotated the second flower head slightly and popped up with foam tape. I heat embossed the scripture reference on black cardstock, glued in place and stamped the other sentiments directly on the panel. I added some twine along the top to finish it off.


This post linked to:

 Word Art Wednesday - Anything Goes


I hope you enjoyed today's card and thanks so much for stopping by!

Karen

Saturday, April 2, 2022

With Love & Prayers

Happy Saturday! The April Release is here and you are going to LOVE it! My first card with the new release features the Stamp of the Month, Church Family. I love the mix of fonts and scripture references included in this set!


I recently sat down and created some backgrounds with the knit stencil. Honestly, I had no plans in mind when I created these backgrounds. I just picked some colors I liked and played knowing the ideas would hit me at some point. 


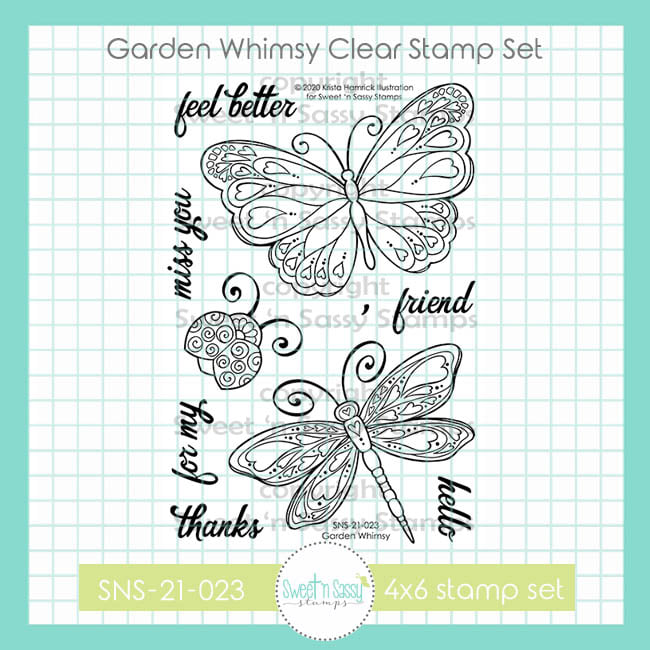
The blue background was the jumping off point for my card. To create the background, I used cool caribbean cardstock, the knit stencil along with cool caribbean, tempting turquoise and taken with teal dye inks. After I created this background, I searched though my stash of already colored images. I was excited when I came across this butterfly I colored a year ago. Yes, you read that right, a whole year ago when Garden Whimsy was first release. I remember coloring this image, trying to make it work for a card and almost pitching it in the trash when nothing panned out. Now, I am really glad I saved it!

Now that I had the main image selected I knew I had to do more to the background. I added texture and visual interest by stamping the script background in brown, the dots from texture tiles 6 in white and adding black paint splatters to complete the look. 

I stamped the sentiments in black ink, cut to size and added black lines along the edges. I die cut the background panel, matted with black and attached to a white card base. I added some white highlights with a gel pen to the butterfly. I popped the butterfly up with foam tape, glued the sentiments down and added some light blue gems to the front to finish it off. 


This post linked to: 


I hope you enjoyed today's card and thanks so much for stopping by!

Karen